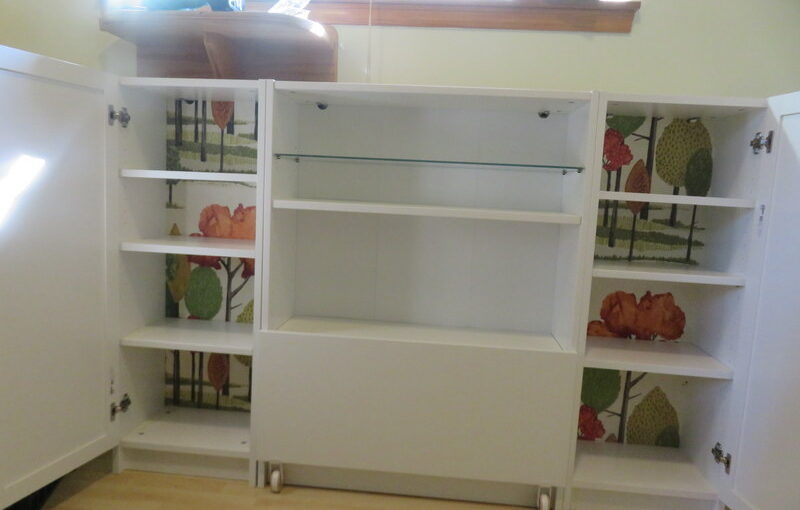
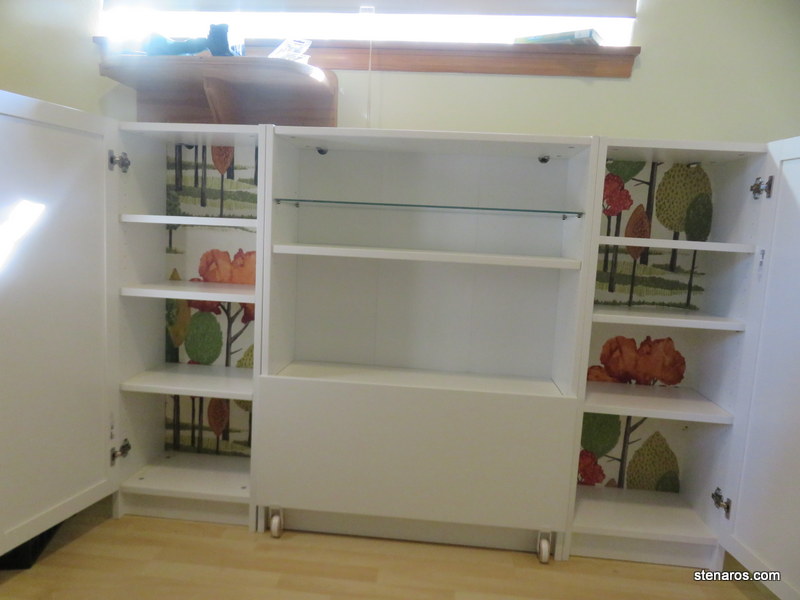
After successfully wallpapering my closet, I put a hoped-for plan into action by wallpapering the back of my Billy bookcases. Look how fun!
Much like the wallpaper in the closet, this one of those bedroom renovation things that is just for me, which makes it quite enjoyable, and also fun to show off.
Despite my sewing-underwear adventure, mending/fixing things comes before sewing. I’ve had a pair of jeans I bought from Goodwill (using only measurements because they took away the dressing rooms during the pandemic and never put them back) that were too long. This is par for the course for pants because I’m very short-legged.
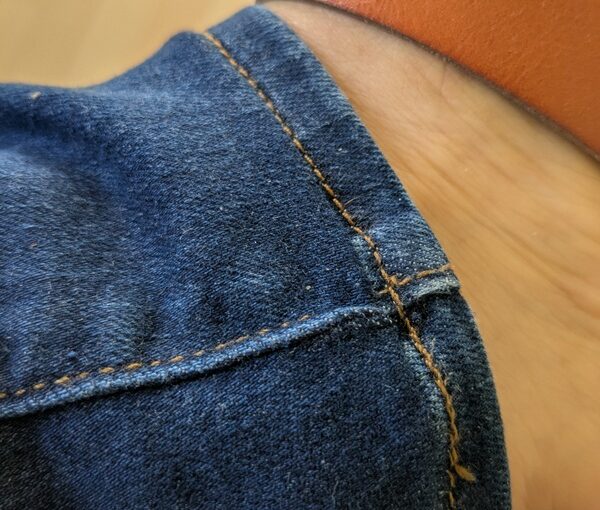
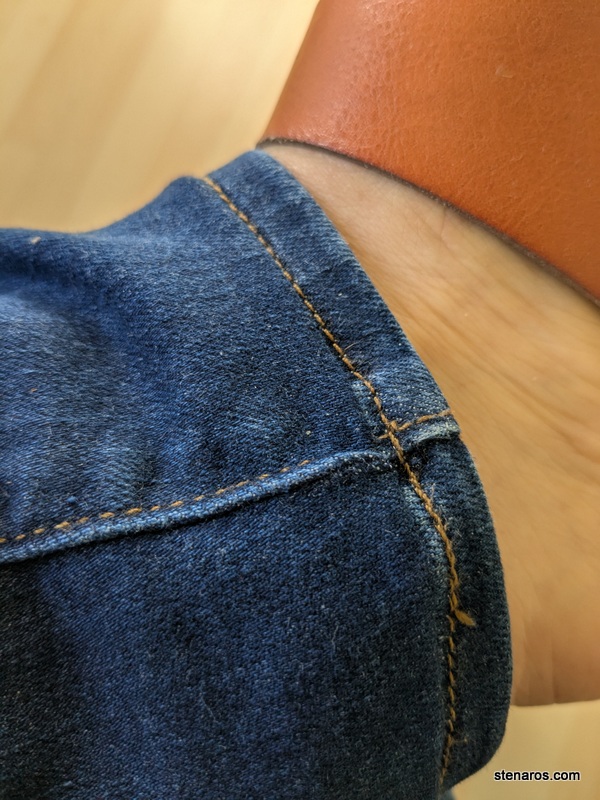
I have been taking all my pants to the tailor to hem them, but my sewing machines are handy, so I thought I would do the job myself. I watched a tutorial for making a Hollywood hem, which is where the original hem is retained, the excess length is cut away, and then the hem is reattached.
Success! Thanks to the very helpful step-by step video from WeAllSew, I now have a good looking hem and my jeans are the right length! In the picture you can see the fold where the new seam is at the top of the picture, but looking at it from a distance further away, it looks like the original hem.
I’m very pleased, and big thanks goes to Alison Freer, the author of How to Get Dressed for alerting me to the existence of the Hollywood hem.
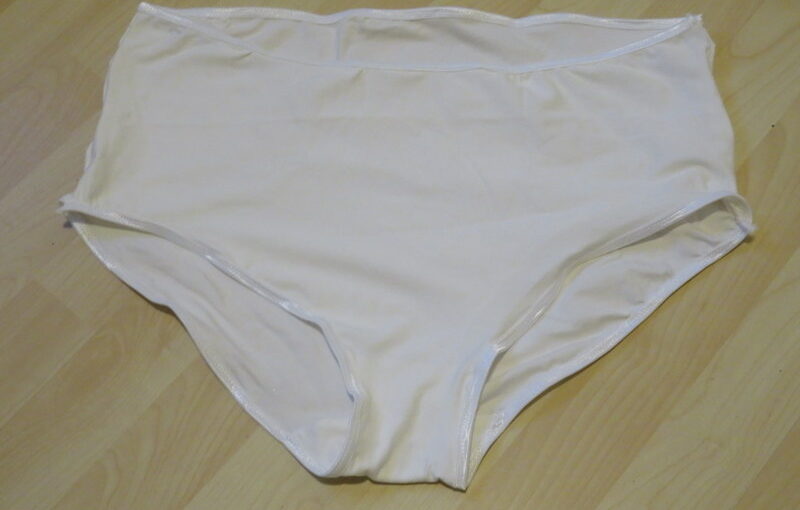
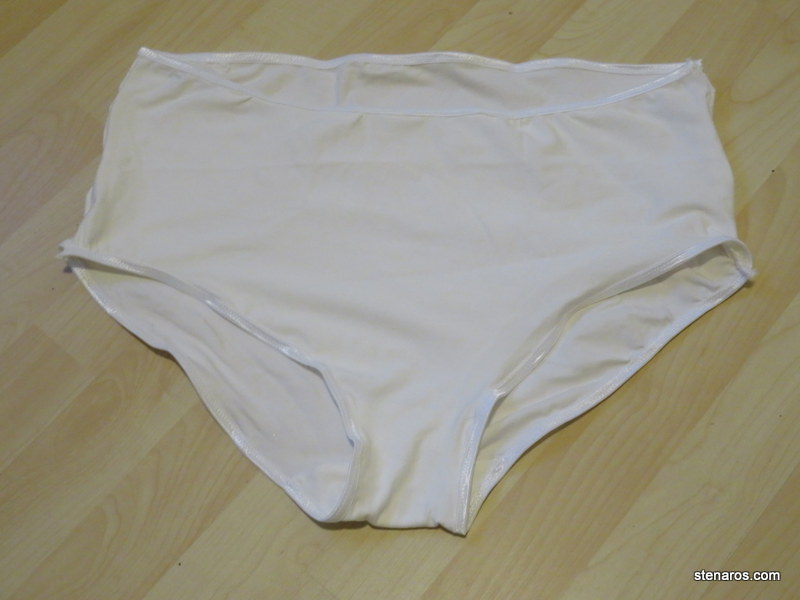
Fun fact about me: panties is a word I loathe and avoid saying in the normal course of events. But it’s appropriate in this case.
I sewed some underwear!
Now that my sewing machines are accessible, I’ve been casting about for what to make first. I cycled through a lot of fun things (dress! pants! top!) before coming to the conclusion that what I really needed was new underwear. And while I know that bras are not something I want to integrate into my sewing wheelhouse, knickers seemed to be in my skillset.
I took a class from Sincere Studio, a new-to-me sewing studio. The class was great, walking us through what kind of elastic to purchase, what kind of material works the best, and then taking us step by step through the sewing process. I’d not worked with fold over elastic before, so that part was very helpful.
The instructor let us know that the first pair of underwear we make will probably not be quite right. But by the third pair, we will have locked in the skills and will love our underwear.
When cutting out the pattern, I went for a higher waist because my current underwear slides down in the front. I almost went for the highest waist, but the instructor said the high waist was really high, so I knocked it back to a medium-high waist.
The pattern (Iris Knickers, by Tilly and the Buttons) was easy to follow and had a little trick for joining everything up that was helpful. When finished sewing them, I tried them on and found that, my goodness, that underwear was high waisted! The legs are the slightest bit tight, but not terribly so.
I’ve been wearing my very large pair of underwear with dresses and such, and one thing I do like about them is that they don’t crawl up. I put them on, and they stay in place for the day.
So I do have some iterating to do, and I wish I hadn’t bought quite so much of bright white organic cotton, but I’m looking forward to my homemade underwear future.
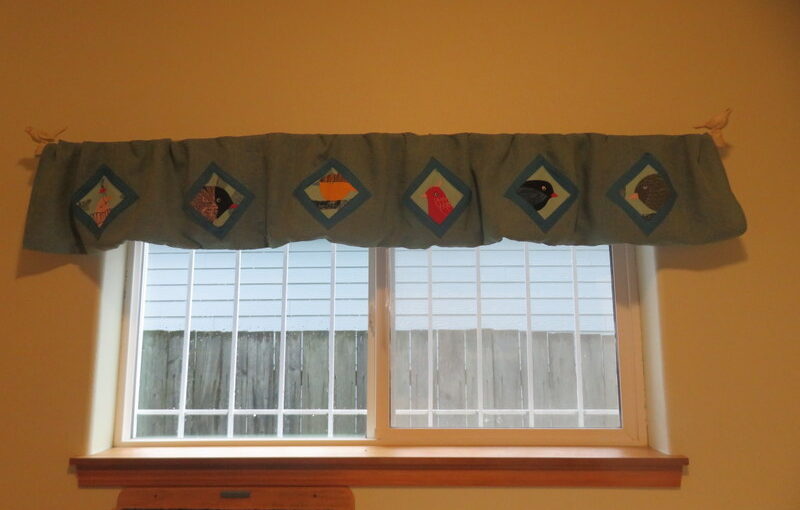
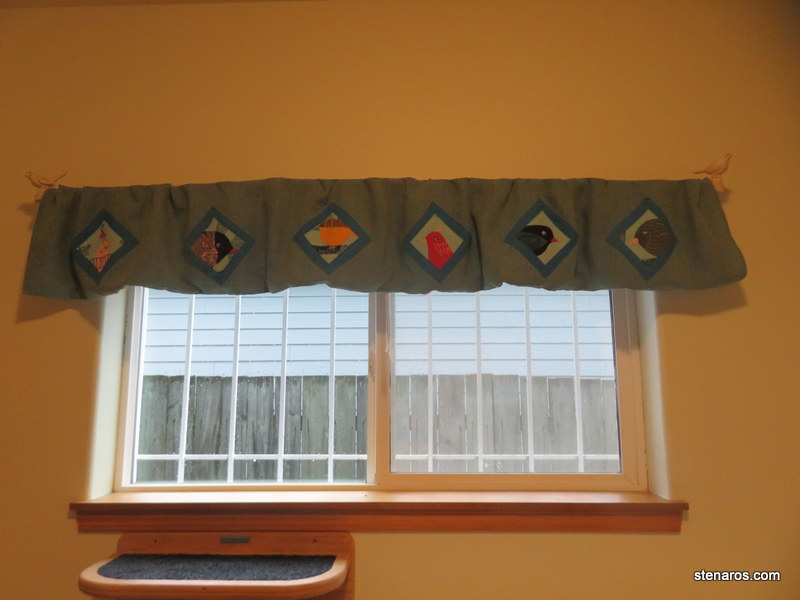
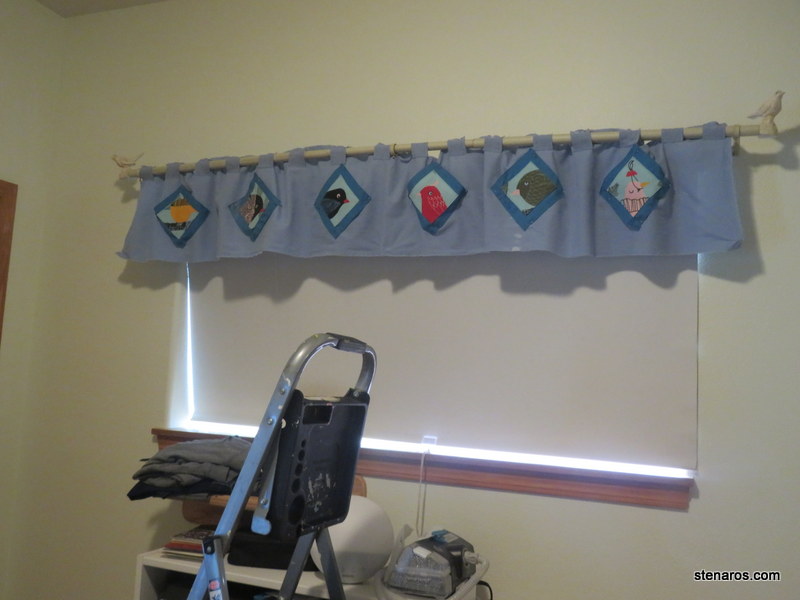
I have finished sewing my valance. Here it is on the wall.
Do I like it? I do not. For some reason, I didn’t figure out that it would be wavy, even though I knew I was cutting it longer than the width of the curtain rod. I don’t like how puffy it is.
But I also didn’t like the curtains that were the previous tenants of this window, so the valance is continuing the tradition.
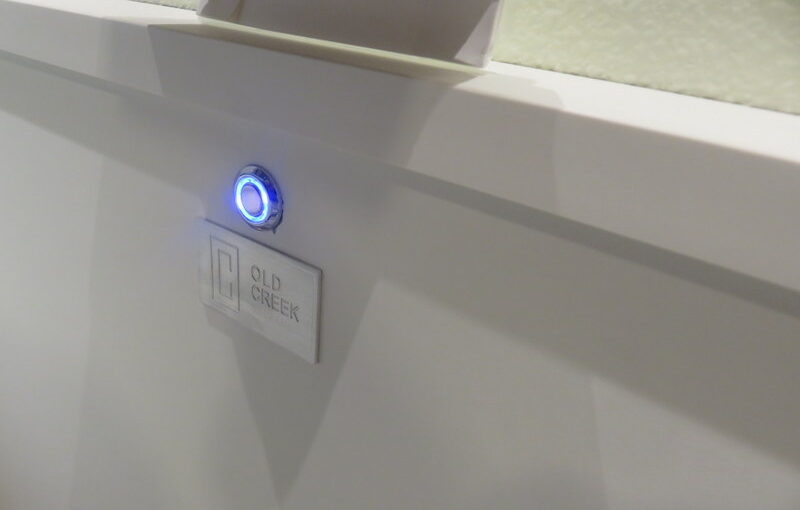
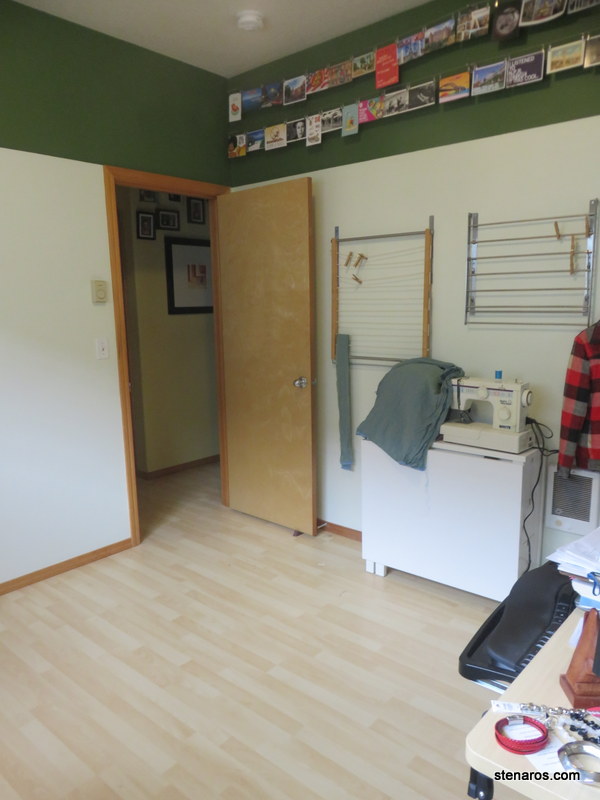
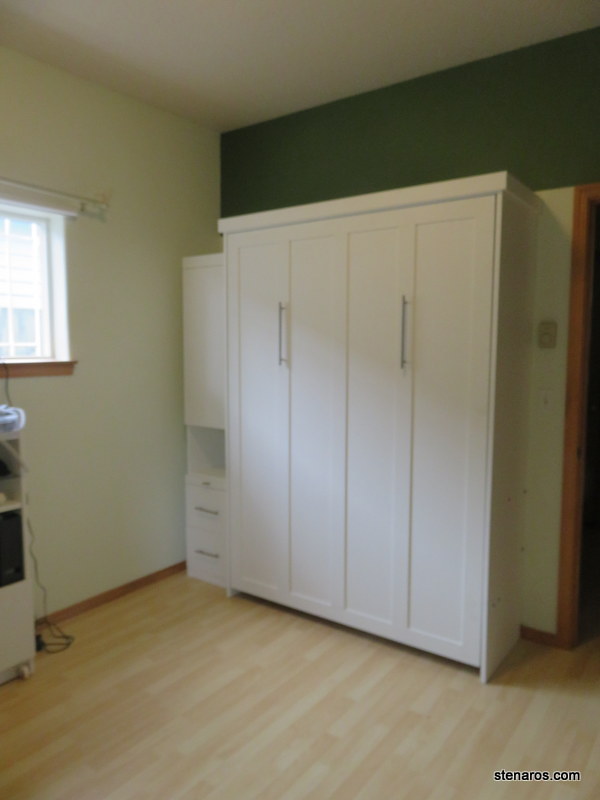
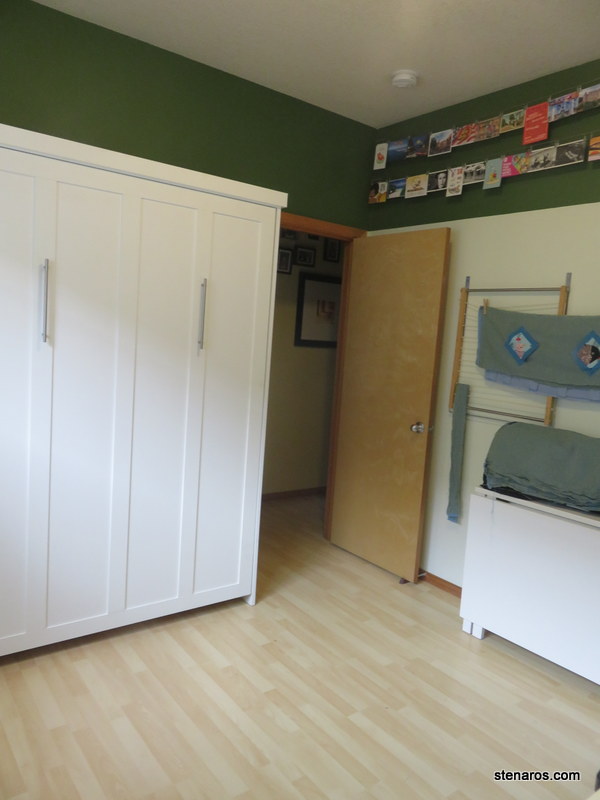
I really like the Murphy bed’s built-in lights when they are on and I am reading. However, they have a significant design flaw.
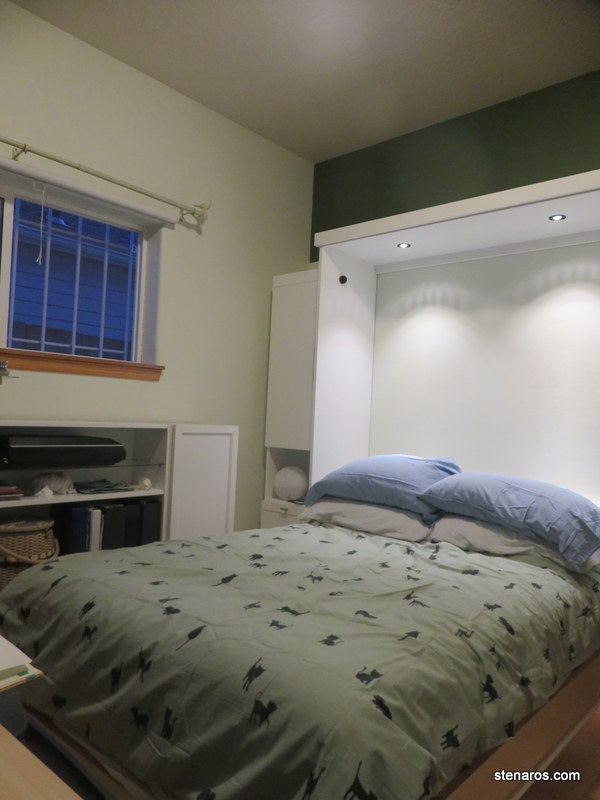
You can see my jury-rigged solution: part of the packaging from the Ikea pillowcases I bought. It doesn’t entirely solve the problem; it just lessens it.
The button to turn on the lights has a very bright blue light that shines regardless of the on/off status of the lights themselves.
From the future, I can say that the second layer of solution involves me leaning the memory foam pillows against the headboard to cover the light. There’s a void between the mattress and the wall, so the pillows sit at an angle.
That means I can’t really use them as pillows, just as light blockers.
Other than that situation, I’m really enjoying my Murphy bed.
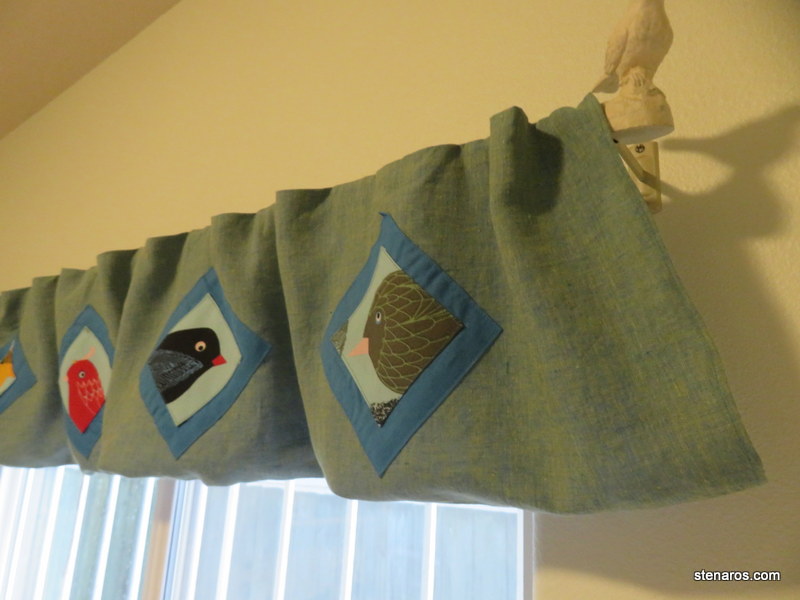
I have attached the rod-grabbers to the lining of the valance, and hung it up to see how it looks. I am, at this point, regretting not getting a lining that was more in line with the color of the valance.
But things seem to be fine.
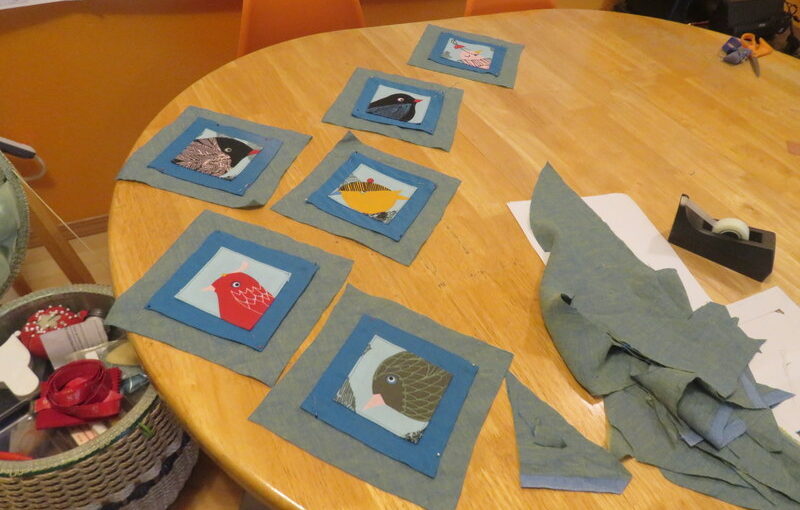
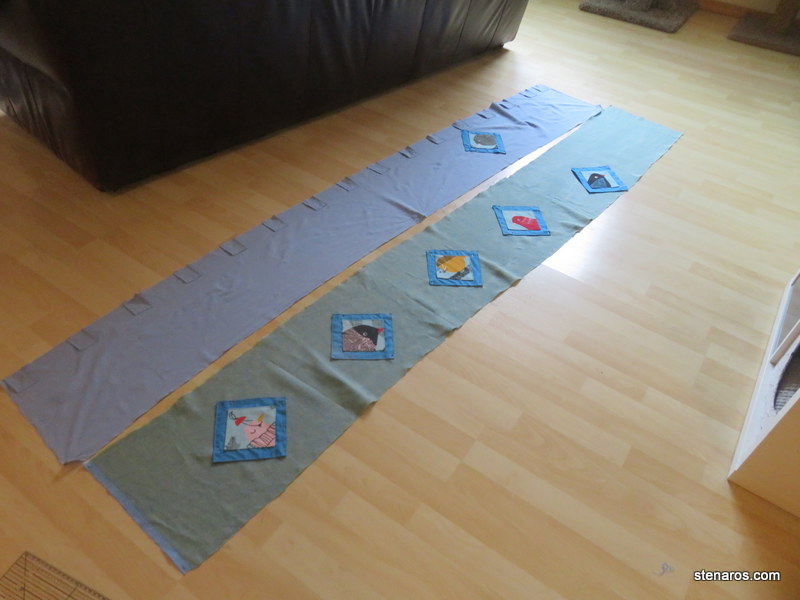
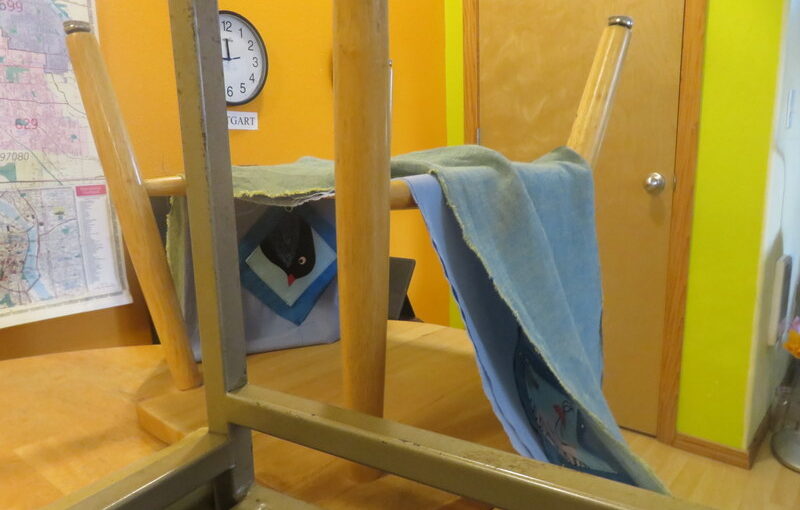
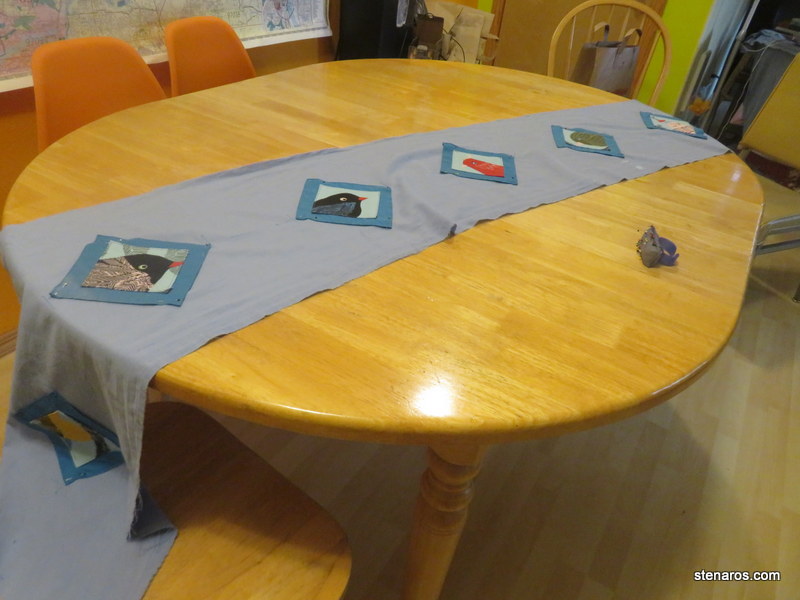
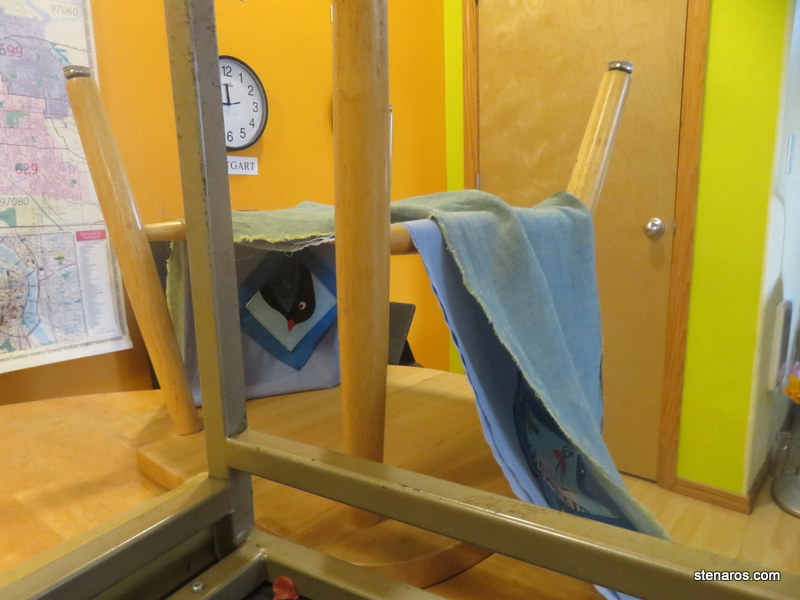
Laying out the official material and positioning the birds.
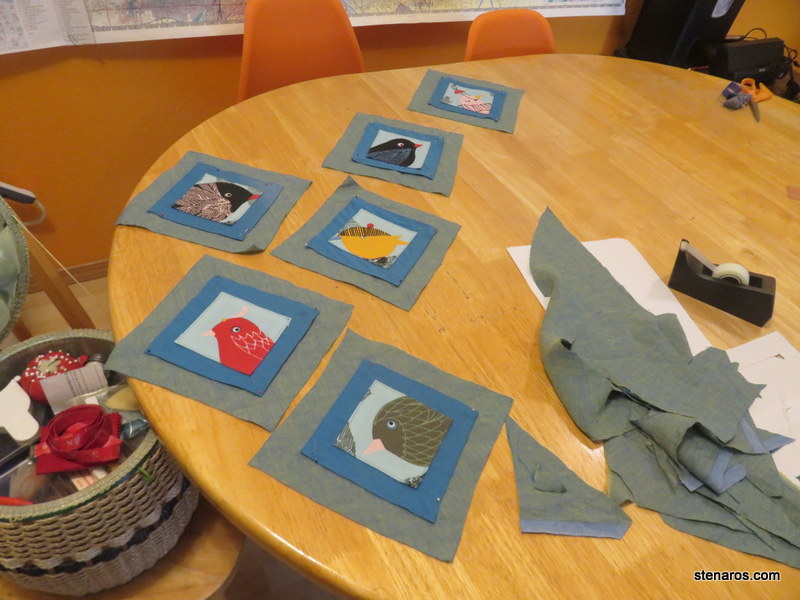
Then I got distracted by the bonus project, which is to take the additional birds and make decorative diamonds. I had enough material to add a matching diamond to each bird. These will eventually be wall decor.
The curtains are gone, but before I put them in the fiber recycling bag, I took the diamonds with birds off of them so that I can repurpose them as part of the new valance.
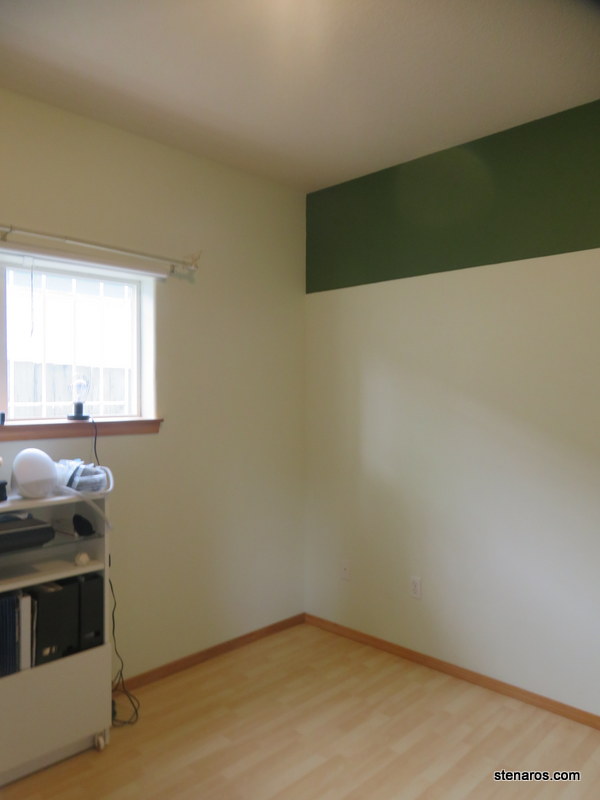
As I was planning the renovation, I realized I never shut the curtains in the bedroom because I had a shade, so it made more sense to make a valance.
Here, I have cut out the backing material (it was an old sheet of Matt’s) and am testing the best layout for the birds.
Here, I have put the official material over the backing material, but I have not yet moved the birds.
This will be a project that is done in fits and starts.
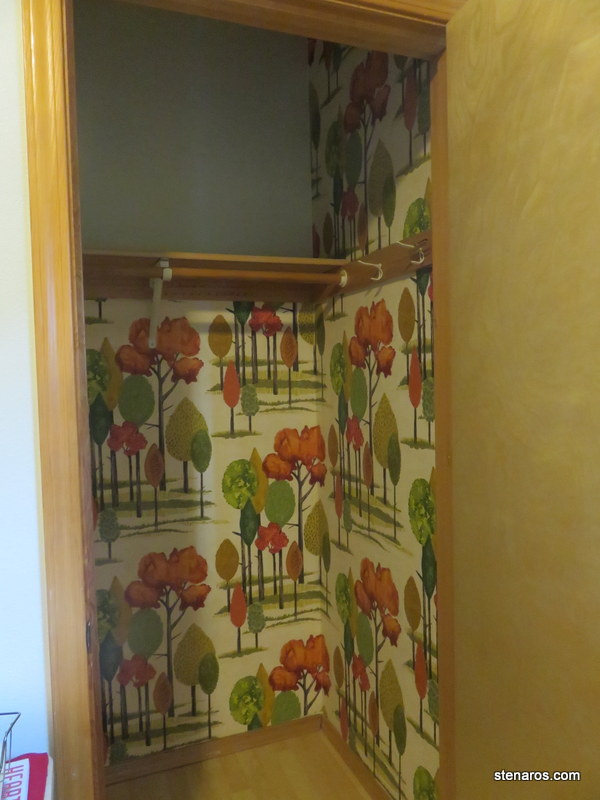
When I got the bright idea to wallpaper my closet, I wondered if the fact I watched my mother wallpaper thirty to forty years ago meant that I had absorbed skills and that I could also wallpaper.
You know what doesn’t exist anymore? Wallpaper stores. I wanted to go to a store and flip through some books like I did thirty to forty years ago. I made an attempt, visiting a paint store whose website said they had wallpaper, but it turned out the wallpaper had moved to their Lake Oswego location and no one had updated the website.
What does exist now that didn’t thirty to forty years ago is the internet, the place where I bought my wallpaper, and the place where I watched five to ten videos about how to wallpaper.
One of the last videos I watched said, as if this was common knowledge, that if you have textured walls, you need to skim coat them before wallpapering. Cue watching several videos about skim coating.
My painting friend S. North pointed out that this was one and a half walls in my closet, and maybe I didn’t need to skim coat? Because I had to buy two rolls, I figured I would do one panel to see how it went with textured walls.
It was fine. If I was wallpapering the main room, I would have to skim coat, but for my purposes, the textured walls were fine.
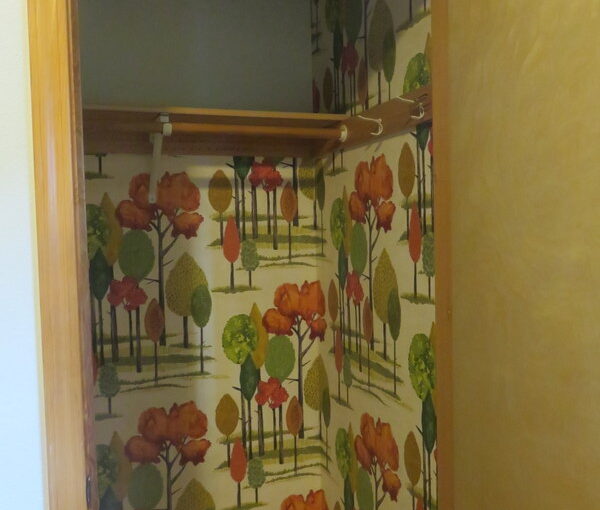
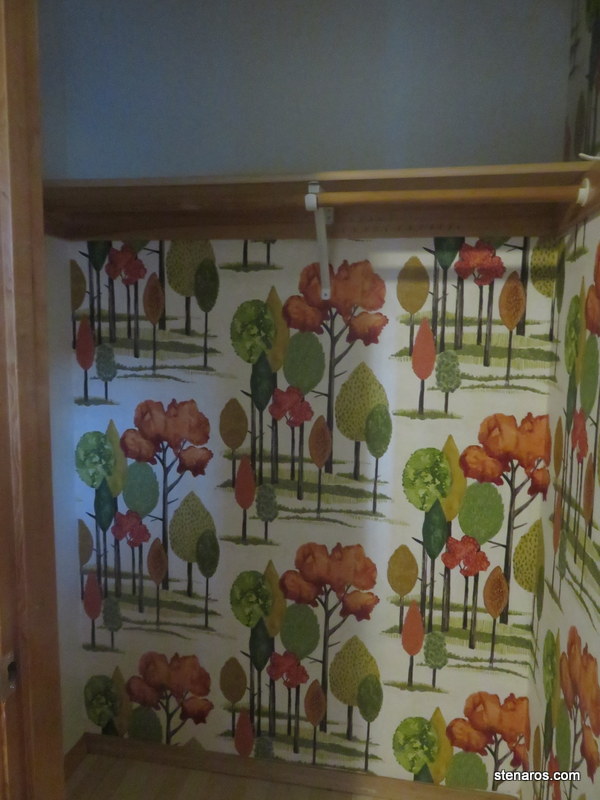
Having put one panel up, I kept going and two to three hours later I was done! I did have the skills!
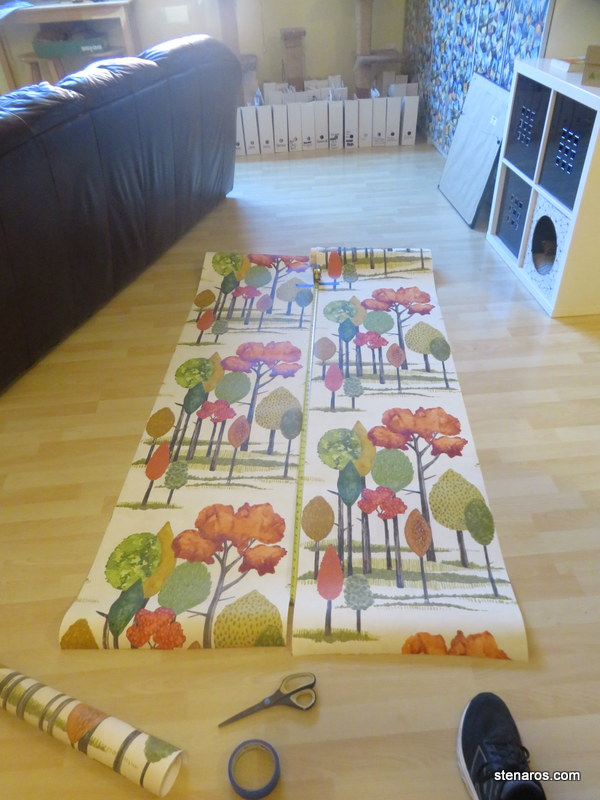
Here’s the wallpaper. I liked the trees and the autumn colors, plus there was orange to go with the green, and orange is good to work into everything.
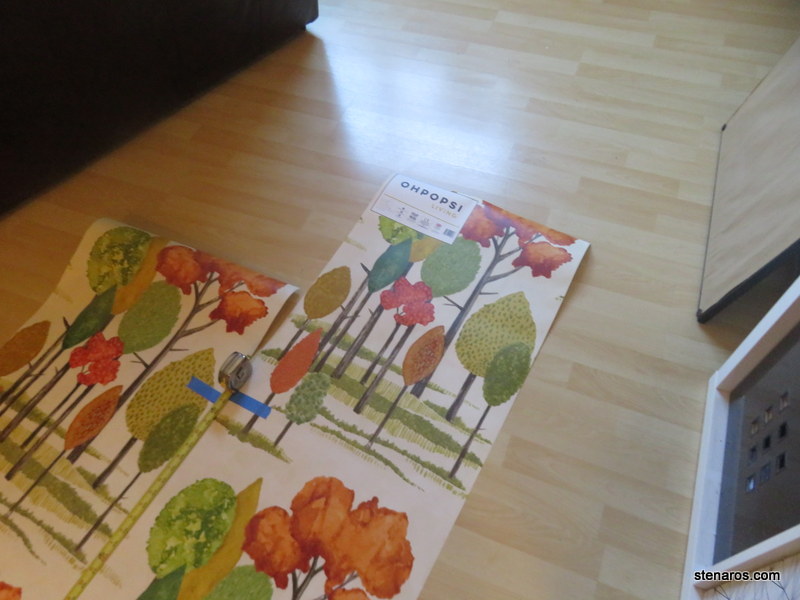
One of the videos I watched suggested using painter’s tape to mark where the drop was, and that worked very well. This pattern had a big drop, which was annoying.
But look! Done! I hadn’t thought about what to do about that shelf support, but I took the screw at the bottom out and had Matt hold it away from the wall when I was hanging that panel. It worked great.
I probably should have watched a few more videos about turning the corner, because that was a little rough, but overall okay.
This was a super fun project (that I dithered about for quite some time before starting) and I’m pleased with the results.
Now to put the closet back together. In that first picture you can see most of the closet contents waiting to go back.