Provence Smock is awesome, but the directions are not. Here is my translation.
I think this is an advanced beginner, if not an intermediate project.
To begin. The green smock below was made with the pattern available in the book. I have a 42″ bust. When I finished it, I was a little surprised at the fit, it was much tighter than pictured on the model. This should not be a surprise as I am not a model, but it was.
I made the second apron bigger by adding one inch to the yoke, front part and straps. You can see the fit difference below.
After wearing both aprons for more than a month now, I can say that I prefer the tighter first version, as it better stays in place through the day. I think the second one looks more like the fit in the picture, but I don’t like how loose it is. If I were to make another one, I would still add an inch to the straps and keep everything else the same.
Let’s talk yardage. The directions call for 1.5 yards of fabric (or toile). I found that with that amount the layout was tight on the green apron and it wasn’t enough for the patterned apron, as you will see. I would recommend 1.75 yards, or 2 yards if you are wanting to be super-safe or match patterns. All other materials listed are correct, though thread got a bit dicey with the green apron.
Directions from the book are in bold, my commentary is in normal font.
1. Cut out the apron pieces using the pattern pieces. Yes. Do this. If you want a fit more like the patterned apron and you have a 42″ bust, add 1/2 inch to the front piece, 1/2 inch to the yoke and 1 inch to the straps. Wait a bit and I will get to the second half of the instructions of step one.

The pieces with added amounts. Both the yoke and the front are cut on the fold, so adding 1/2 inch will give you an inch total.

Lay out your pieces. Here, aside from the cat “helping,” you can see I don’t have enough material to fit the entire front piece. This would have been the case even if I hadn’t increased the pattern size.

Checking to see if everything else will fit.

The pocket pattern says “cut 4,” but later the pattern refers to the pocket lining. If you need to save material, cut 2 of your pockets out of a different material, as I did here. These became the “pocket lining”.

Here is how I made it work. I drew a line to bisect the front pattern piece.

Then I cut the piece and moved the shorter piece down into the area where the second set of pockets would have gone.

Be sure to add 5/8 for a seam allowance to both pieces. Then, I joined the newly created side pieces with the front piece using a French Seam.

Hot tip: Use tailor’s tacks to mark the dots where the pockets are. This will become important later. Also use tailor’s tacks to mark where the buttons will be attached. This is less important as exact button placement is not key to this project.

2. If necessary, splice the bias tape together to create one long piece. Save the spliced bias for binding the outer edges of the apron, where the spliced edges will be easier to hide. If you are buying your bias tape in the standard packages, you will need two packages and you will need to splice it together. I found a tutorial on the Internet that I have not been able to find again. But you should have a good idea of how to do this, so watch some tutorials. It’s one of those things that freezes my brain and I can’t think. As for the second half of the instructions, ignore them. If you start attaching the bias tape where they instruct you to and you are using packaged bias tape, it will automatically fall on the outer edges of the apron. An important bias tape note. I skipped step 16, making the bows and attaching them to the pockets. That left me with a healthy amount of excess bias tape. This meant that whenever the directions said to “leave 1/2 inch bias tape on each side” I made that number “2 inches” because I knew I would have enough bias tape and I wanted more play, just in case.
3. Attach the bias tape blah blah blah. This makes no sense to do right now. Ignore this step. Just cross it out.
Mark the circles on the yoke but only on one piece. The other one will become the yoke back and will not need them.

Second half of step one.
1.[That step up above then ]
Trim all the outer edges of the fabric pieces to accept the bias tape. Set them aside. This means the following: Stay-stitch all outer edges of the apron 1/4 inch, trim to 1/8 inch. “All outer edges” means the neck straps, (except where they join the yoke) the front piece (but not the top) and ONLY THE TOP of the pockets. The yoke that doesn’t have the circles marked (a.k.a yoke back) will be stitched all around, (but not where it joins the neck straps) the yoke with the circles marked only needs stay-stitching on the inside and on the outside to the circles. See the picture after the next one for an illustration of this.
Important thread note! This is a rather thread-intensive project. The green apron used up nearly all of a standard spool of thread. If you are worried about running out of thread, use something else for the stay-stitching, which will be covered by the bias tape.

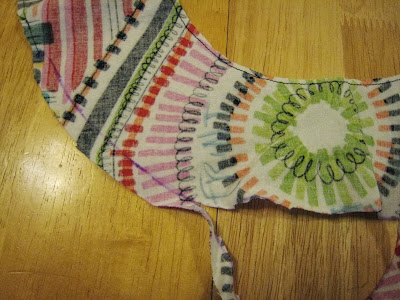
An illustration of what all the trimming back looks like.

4. Cut two strips of fusible interfacing…and press them where the two buttonholes will be. Yes. Do this. And while you are messing about with fusible interfacing, why not also do:
 17. Cut two small squares or dots of interfacing and fuse them to the wrong side of the neck straps
 [they mean apron front]
where you will sew the buttons. If you would like to give that button a bit more support, cut out a few scraps of material and sew it over the interfacing. (I have no picture of this because I did not do it.)
5. Trim one of the yoke pieces 3/8 inch away form the lower edge between the circles. This piece will become the yoke front; the remaining one will become the lining. Do not trim the lining. Yes. Do this.

Marking and trimming.
We are usurping steps 9 and 13 here, because this way makes more sense. Take a length of bias tape and cut it to fit the front yoke between the two circles PLUS at least two inches on both sides. The directions say 1/2 inch, but better to have more tape to cut off than to run short (which happened to me with the green apron.) Attach the bias tape to the yoke front on the back.

DO NOT yet attach it on the yoke front.

I’m not really sure why we suddenly jump over to pockets. Feel free to save this until we actually get to the attaching pocket phase.
6. Sew the pocket front and the lining together [with wrong sides together] using a [1/4 inch seam. Press it down. Do not turn. Do not press seam under at this time] The instructions and I very much differ about the pockets and I think my way is better. So go with 1/4 inch rather than 3/8 and don’t trim or press anything.

6. (Continued.) Run two gathering lines across the top of the pocket, and set it aside. Would you like to know a good place to put your gathering lines, so they don’t get caught up in the bias binding? I thought so. Put them at 5/8″ and 3/4″.

7. Run two gathering lines across the top of the apron front. Set it aside. Would you like a suggestion for a good place for those gathering lines? Put them at 1/4″ and 3/8″.

8. Join the neck straps to the yoke and yoke lining. Press the seams open. I would add to make sure your neck straps are going in the right direction. It’s easy to get them reversed, especially if you have spacial relations problems. But here’s what it looks like properly lined up.

9. Sandwich the yoke and the yoke lining together. Baste or stitch them with the longest machine stitch [on the edges beginning from the center front yoke and working out to the edge of each neck strap.] Press [the joined yoke and necks straps] down making sure all edges are evenly aligned. Trim them if necessary. If you are hand-basting, I would baste through the center front of the yoke. If you are machine-basting, I wouldn’t. REMEMBER not to sew through the lower part of the yoke–the part that will attach to the apron front–because that will make it difficult to complete step 11.

[Step 10 is moving to a later time]
11. Attach the apron front to the yoke lining, with the right side of the lining to the wrong side of the [apron]
front. Match notches and center front. Adjust gathers, and stitch them together with a 5/8 inch seam. Press the seam to the yoke. This means gathering the apron front first. I like gathering; it’s fun. Here I am showing you my apron front center. Of note: I found figure 1 in the book helpful at this point.

11 (continued.) Remove the gathering threads, and trim the seam to 1/2 inch, clipping curves if necessary.And here is the joining, sans gathering threads.

Here is the trimming.

13. [You’ve already done all of the other parts back when we were usurping steps 9 & 15 so all that is left is to]
stitch through all thicknesses.
14. Encase the outer edges of the apron front. Begin at the inside edge [but not at the corner] of the left neck strap. Bind the inner neck strap, continuing around the yoke. Miter the right corner of the neck strap and continue along the other edge, covering the exposed edge of the bias tape on the front of the yoke. [If you have excess bias tape on the yoke you will need to trim off the excess.] When you reach the [beginning,] finish off by turning in the edge and stitching through all thicknesses. I had not mitered corners before and so found a tutorial on that topic. It’s also worth thinking about how you will start and end your bias tape so no raw edges show. But other than the terror of the unknown mitered corners (they weren’t that hard) this was a rather satisfying step. The whole thing gets encased. So fun!

Also, after this you can do:
10. Mark the buttonholes on the right side of the neck straps and then make the holes. My machine isn’t able to make button holes right now, so I had to use a friend’s machine later.
On to the pockets. We are almost done.
If you have already done step 6, then continue. If you have not yet done step 6, do it now.
15. Pull the gathers on the pocket to equal 5 inches across. Bind the top edge with the bias tape, leaving [2 inches] on each side. Remove the gathering stitches. I found it helpful to mark off five inches on my directions so I could gather properly.

Here we go into my pocket adaptation. Mark the tailor’s tacks indicating the pocket placement with chalk or disappearing ink.

Make a template of the outline of the pocket using a thin cardboard.

Using the tailor’s tacks/marks as a guide trace around the pocket placement template using chalk or disappearing ink.

Sew the pocket on the line you have drawn, folding the raw edge under as you sew. Use the line of stitching you made to join the pocket and lining. You needn’t worry if the pocket comes out a bit askew, the gathers of this style make it hard to see.
15. (continued) Use the seam leveler at the corners as necessary. I wasn’t sure what a seam leveler was, but handy googling told me I didn’t need to buy a tool. If you used packaged bias tape, just fold over the cardboard piece that comes with the bias tape and snug it up against your presser foot. Instant seam leveler.

If you are worried about your pocket strength, sew a second line of stitching.

If you haven’t yet done the first part of 17, do that. then.
17. (continued) Sew the buttons through the fabric and interfacing.
Stand back and admire your finished creation.

I hope this tutorial has cleared up any questions you might have. If you find it helpful, please leave a comment and/or link to your finished apron. I would love to see it.


Cute! I like the look of the tighter fit better, so I'm pleased to hear that it's more functional as well. I really like both of those fabrics though. Thanks for providing instructions. I'll never use them, but I think it's really cool of you to write out easy instructions for people interested in making an apron.
Amazing tutorial, and amazing aprons. You look like a woman of action in them. I admire your painstaking sewing and documentation of the sewing. I'm picking up Russian Burda Magazines here in Ukraine and I have noted several jackets and coats, as well as other good patterns. I'm eager to have you try a coat so your tutorial can enable my half-assed sewing style.
Very fun fabrics. It's so great to see them finished
.
I left that off of my last comment…
And woo hoo! 31 or so comments, done!
I remain in awe. You are a wizard with magic fingers. The fabrics are so fun. (applause) Thanks for sharing. KMS